Showing posts with label vegetarian. Show all posts
Thursday, November 7, 2019
Simple Spaghetti Squash Fritters
This is an older recipe I blogged a few years ago that's getting a fresh update. I think my favorite adaptation of most things is turning them into a fritter, a croquette or a pancake. It's always the easiest way to use leftover ingredients that turns them into something entirely different, unless that's what you set out to make initially, which I often still do. They're versatile and the vehicle is totally up to you, whether it's on a bed of greens, in a wrap or a pita, over quinoa, rice or pasta or even as a meatball and put between your favorite crusty bread. Plus, they can be an appetizer, brunch or a side dish for dinner paired with your entree. Anyhow, this recipe is a little simpler, made gluten free and can also be spread into a waffle maker for something savory to go with chicken or fish. Also, excellent holiday food since spaghetti squash tastes best in cooler weather. This version is not vegan but I will include notes on how to adapt it if you desire. I topped these with a tangy tahini sauce, lemon zest, parsley + paprika. Let me know what you try!
INGREDIENTS
1 medium spaghetti squash, baked and cleaned (about 4 cups)
3 eggs (substitute a flax egg ratio for each one if vegan)
1 bunch scallions, finely chopped
1/4 c fresh parsley, chopped
2 T fresh thyme, chopped
1/2 cup almond or oat flour (all purpose works just as well)
1/4 t baking soda
1/2 t cream of tartar
1/2 t kosher salt
salt + black pepper
olive oil
TANGY TAHINI SAUCE
1 cup greek yogurt or labneh (or substitute your favorite vegan yogurt here)
2 T tahini
juice of 1 lemon
pinch of salt
pinch of coconut sugar
enough water to obtain a drizzle consistency or less for a creamy dressing (add slowly and stir)
Mix all ingredients together a fork or whisk until smooth
METHOD
Preheat oven to 375 degrees. Cut squash in half from end to end and scoop out the seeds. Brush with olive oil, salt and pepper and place face down on a baking sheet lined with parchment paper. Roast for 25-30 minutes until a knife inserted into the skin side pierces easily. Remove and let cool while you assemble the sauce and the batter ingredients. Leave the oven on to finish in the oven.
Mix flour, eggs, baking soda, tartar, herbs, salt and pepper together in a large bowl. When the squash is cool enough to handle, scrape all of the meat from the skin into a separate bowl. Turn out onto a thin dish towel and squeeze as much liquid from the squash as you can, making it dry and a little stuck together. This will ensure a crispier fritter and keep them from becoming mushy. Mix the squash into the batter and let it rest for 15 minutes to absorb the flour.
Start heating up some olive oil or coconut oil in a heavy bottom pan - enamel coated cast iron is great! If you are using a waffle iron, spray both sides with cooking spray in a mister or dip a silicone basting brush in oil and coat all the grooves. Measure out about a tablespoon and a half for croquette size, a little more pressed thin for a pancake and if using the waffle iron, spread the batter evenly.
If you made fritters or pancakes, after pan frying, transfer to the sheet pan you baked the squash on and finish in the oven for 15-20 minutes to fully cook the inside. You should have a nice crust on the outside. When you're ready to plate, top with the tangy tahini sauce, fresh parsley, pepper, paprika, lemon zest or juice and devour!
ENJOY!
Thursday, March 28, 2019
Perfectly Traditional Falafel + Tzatziki
I've been making falafel for years, and recently, I figured out I'd been doing it all wrong. I've embellished it, made it with canned chickpeas, added various flours and baking enhancers in order to pan fry it and finish it in the oven trying to make it healthier, la ti da. None of that works.
I recently read a scientific article about it and my head split open. Food science is so basic and molecular. It makes much more sense when simplified, and explained. So this post isn't really about the best falafel recipe, which only has three ingredients. This is more of an expansion on what I read and how it can be applied to making them perfect every single time.
Without any unnecessary, long-winded explanations, this is simply an issue of starch. This is why using canned chickpeas NEVER works. Because they have previously been cooked, all of the necessary starches contained in the chickpeas has been cooked out. That is the crucial ingredient that binds them together, giving you the perfect inside texture that is not doughy or resembling something more like a dumpling. Using soaked chickpeas is pure magic. By soaking them for 24 hours, they are allowed to soften and slightly sprout, making the nutrients more bio-available and easier to digest, plus adding some moisture which will allow them to steam as they cook. The temperature of the oil is also hot enough to fully cook the mostly raw chickpeas.
The method involves a food processor and the right size pot for a medium-deep fry. Using a medium sized dutch oven works really well but it needs to be heavy bottomed so that you can control the temperature of the oil and so that they don't burn as they fry. I used my Le Creuset 2.75 quart dutch oven, which is enamel coated cast iron. It was awesome for this method. The high walls reduced any splatter - no mess! This was halfway between a pan fry and a deep fry. The oil went about halfway up the sides of the falafel which were about golf ball size and then flattened slightly to create flat sides that would make good contact with the bottom of the pan, meaning you only flip them once.
These take about 3-4 minutes on each side so you need to stay with them and not walk away, as they can burn easily if overdone. The oil should be in the 350 degree range. Test a small amount of batter to see that it's ready or use a candy thermometer to accurately gauge it. Use a high heat oil such as avocado oil. It's a healthy fat and is much better than canola or vegetable. You could also use a neutral coconut oil. Drain and blot on paper towels. They will be crispy on the outside and warm and soft on the inside - not mushy or doughy. Really good and best consumed immediately! I've included a basic recipe for the batter. My simple spelt tortilla/flatbread/pita recipe works very wells as a wrap, especially if you are gluten-sensitive. You can find that using the search tool on my blog as well.
HERBED FALAFEL
Makes 9-12 ( Depending on size )
1 cup organic, rinsed chickpeas, soaked 24 hours
1.5 - 2 cups packed herbs of parsley, cilantro, mint and chopped scallions
2 t each cumin and coriander
salt to taste - a big pinch
METHOD
Blend everything in a food processor until well combined. You will need to blend and scrape the sides a few times to do this. Form into golf ball sized portions and roll into balls then slightly flatten. I used a cookie scoop to make them all the same size. Awesome tool for so many things!
Heat oil to 350-360 degrees and gently lower into the oil for 3-4 minutes on each side. Drain on paper towels top and bottom. Serve with pita or your favorite tortillas, on greens with olives, tomatoes, pickles, red onions, feta and tzatziki.
ENJOY!!
Wednesday, September 12, 2018
Paleo Fusion Tostadas
In an effort to reduce my intake of grains, I've been experimenting with recreating some dietary staples such as bread, tortillas, baked things and various crusts. These tostada shells are made from almond flour which give them a crispy, pastry quality that is something between a pie crust and a flatbread. I've been reading the book Grain Brain, which is an interesting and informative perspective on those deeply affected by the spectrum of grain-gluten sensitivity and intolerance. I've also been deeply diving into the personal story and cookbook Against All Grain, which also offers more perspective on the effects of our GMO crops and they have affected our evolving biology. I am personally not on either end of the spectrum with regard to my own body's digestive process, but somewhere in the middle. If you are exploring these topics, I highly recommend checking out both books.
This recipe uses blanched almond flour, fresh lime juice + cilantro. They are baked, not pan-fried which keeps them light and crisp. I'll include various substitutions for the ingredients that work just as well so that you can play around with them and find the one that is best for you, whether that is vegan or purely paleo.
INGREDIENTS
2.5 c blanched almond flour, or a combination of your choice nut flour + GF oat flour
1 t sea salt
1|2 t baking soda
2 T olive oil, or coconut oil
2 large eggs, or equal parts flax egg ( 1 T flaxseed meal + 2.5 T water per egg)
2 t chopped cilantro, or herbs of choice to fit your recipe for toppings
1 t lime juice, or lemon or orange or even apple cider vinegar
METHOD
Preheat oven to 350 degrees. Line a baking sheet with parchment paper. Mix all ingredients together in a bowl or food processor until a dough forms. Portion into 6-8 balls and roll between your hands until smooth. If you have a tortilla press, this works really well for these by pressing each ball between two pieces of parchment paper until about 1|8 inch thick. This can also be done by using a rolling pin, still keeping each one between parchment and rolling out to about 6 inches wide. Transfer each one gently to the sheet pan and bake for 18 minutes, flipping each one and rotating the pan halfway through at about 9 minutes. Transfer to a cooling rack to ensure crispiness.
As always, there are many optional embellishments for ways to build a tostada. The ones pictured here are loaded with a black bean puree, shredded greens + cilantro, chopped pickled jalapeƱos + carrots, my pickled red onions, shredded chicken, labne (or greek yogurt or sour cream), avocado and chili powder.
ENJOY!
Wednesday, November 29, 2017
Zucchini Croquettes with Turmeric Spiced Chickpeas + Tzatziki
This is one of my favorite recipes and I find myself coming back to it all the time with little tweaks and modifications on the original to fit what I happen to be in the mood for. Sometimes I put them on pita and eat them like felafel and sometimes I want them as a savory side to a soup or salad. This time, I was really craving a little of all of that. I made the traditional mint tzatziki and added lemon zest, more fresh herbs and these AMAZING turmeric spiced chickpeas for added protein and heat. Your optimal choice would be to sprout the chickpeas overnight, but using a can of rinsed peas works just as well and certainly expedites this as a quick lunch. I usually make the batter for the croquettes ahead of time and keep it in the refrigerator so that I can just scoop out individual portions and make them right on the spot. They take minutes in the skillet. You can also bake them on a sheet pan at 375 ahead of time and freeze them for later. They are easily reheated in the oven. So versatile!
INGREDIENTS
CROQUETTES
1 medium to large zucchini, grated
1 large leek, thinly sliced (white and light green parts only - save the dark green tops for stock!)
2 cloves of garlic, minced
4 - 5 medium cremini mushrooms, diced
1|2 cup arborio rice
1 cup vegetable or chicken stock, warmed
1 egg (substitute a flax egg for vegan - 1 T flax meal soaked in 3 T water)
1|4 cup flour ( I used oat flour - gluten free works great)
1|4 tsp baking powder
1 - 2 T nutritional yeast
freshly chopped parsley
sea salt + black pepper to taste
olive oil
--> Put the zucchini into a thin dish towel and squeeze out all of the water. Set aside. Cook the arborio rice like risotto. Add the rice to a dry skillet and toast for 2 minutes on medium heat. Gradually add the warm stock one half cup at a time, stirring until it has been absorbed until all of the stock has been added and the rice is tender and a little sticky. Remove it to a mixing bowl and set aside. Warm some more olive oil in the same skillet and add the leeks, mushrooms and garlic, cooking until tender. Add the vegetables and the zucchini to the cooled rice and season with salt and pepper. Mix the dry ingredients together and add the rice mixture until a sticky, doughy batter comes together that can be formed into patties. Chill for about 20 minutes while you make the chickpeas and the tzatziki.
SPICED CHICKPEAS
1 cup cooked chickpeas, drained and rinsed if using canned
turmeric powder
cumin powder
paprika powder
garlic powder
sea salt + black pepper to taste
olive oil
fresh chopped cilantro
--> Warm 1 T olive oil on medium in a skillet. Add the chickpeas and spices and cook until they become slightly crispy and very fragrant. Season with salt + pepper and garnish with cilantro. Set aside.
TZATZIKI
1 cup plain, Greek yogurt (substitute coconut yogurt for vegan)
1|4 cup cucumber, peeled and grated
1 - 2 T fresh lemon juice, peel reserved for zest
fresh chopped mint
sea salt to taste
--> Mix all ingredients together in a small bowl and refrigerate while you assemble the croquettes.
Form the croquettes into small patties, pressing down slightly and cook in olive oil until golden on each side, about 2 - 3 minutes. Serve immediately or freeze for later.
Try them on mixed greens with seasoned, sliced tomatoes. Add the chickpeas and top the croquettes with the yogurt sauce and garnish with extra mint and lemon zest. These are also good in pita bread or served with the yogurt and a soup or even tabouli.
ENJOY!
Wednesday, September 27, 2017
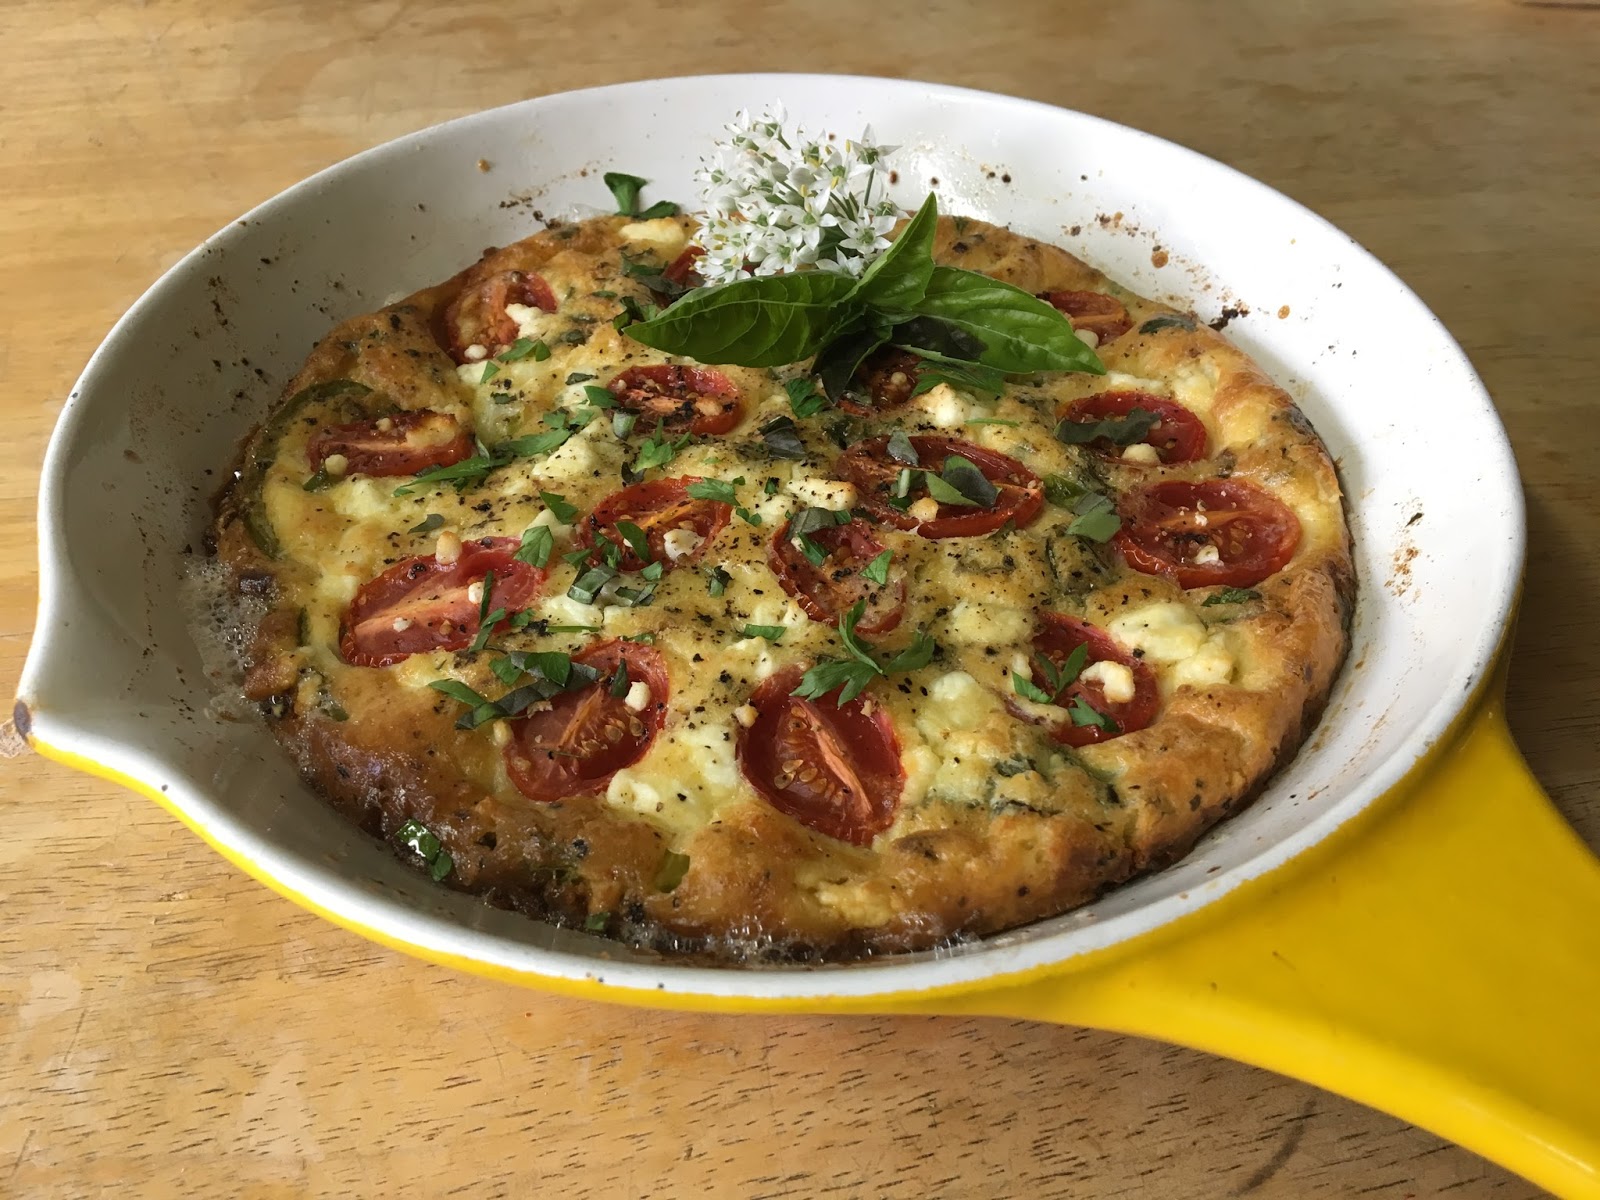
The Anytime Frittata
I might otherwise call this the end of summer frittata, but we just rolled over into fall officially. I'm still using up the slowly fading harvest of the heat as the tomatoes, peppers and basil have hit their peaks and appear to be ready for retirement. I'll be making a ton of pesto to freeze, pickling an assortment of peppers for the pantry and stewing some tomatoes with garlic chives for those tasty pastas, lasagnas, manicottis, pizzas and calzones. How wonderful it is to be able to savor the flavor of summer well into the winter when we get snowed in, become wracked with cabin fever and are left to spend our time hovering around the oven and stove, creating delicious things to eat. Preserving, pickling, canning, freezing and fermenting are incredible ways to extend the life of your garden and get creative with sustainable practices that not only bring us tasty joy, but reduce our kitchen cook print.
Frittatas are about the easiest, one - pan dishes you can make that is suitable any time of the day. I take the opportunity to clean out the crisper and use any excess produce on hand. The combinations of ingredients are limitless and I've found one that nearly suits everyone in my family. The only tools you need are a cast iron skillet and a wooden spoon. I like using my enamel coated one because the egg doesn't stick so badly to it as it does the raw iron. Both will work, but one is tougher to clean. Furthermore, choose the one that is the right size according to how many you want to serve. This is an 8 inch pan and made four lovely servings. Pair it with a fresh salad and you have a perfect plate.
INGREDIENTS
For a basic frittata, make a base of eggs and a little milk or cream. This is basically a crustless quiche. The ratio of 2 - 3 eggs to about 1|4 cup of milk works well and will give you a nice custard.
For this variety, I used these other optional embellishments.
5 - 6 spears asparagus, ends trimmed, stalks chopped, tips reserved
1|4 c red onion, diced
5 - 6 cremini mushrooms, medium to large, thick sliced
2 cloves garlic, minced
1|2 bell pepper, any variety, chopped
5 - 6 large cherry tomatoes or grape tomatoes, halved
crumbled goat cheese
fresh parsley, basil, garlic chives
nutritional yeast
grass - fed butter + good olive oil
salt + pepper + crushed red (or diced jalapeƱo)
DIRECTIONS
Preheat your oven to 375 degrees. Warm your pan on medium high and gently warm the olive oil until it glimmers. SautƩ the onion and bell pepper for about 5 minutes until softened. Add the garlic, mushrooms and asparagus stems. Season everything with salt + pepper + crushed red until just right for your taste. Add 1 -2 tablespoons of butter, the fresh herbs (reserving a little for garnish), nutritional yeast (a few shakes or a palmful) and mix everything together well. Turn off the heat. Mix your eggs and milk together in a bowl and pour right over the vegetables. Arrange the asparagus spears on top with the tomatoes. Crumble the goat cheese all over and bake until golden brown around the edges and little bubbles begin to form and brown across the top, about 30 minutes for this size pan. Up to 40 - 45 for a ten inch or larger. Check the center with a toothpick. It should not be wet and should be firm in the middle if gently pressed with your finger. Serve with a side salad and a basic vinaigrette and some crusty french bread, if desired. It's good for mopping up your plate!
ENJOY!
Wednesday, August 30, 2017
Warrior Chicken Salad
With regard for salads as entrees, whether that's a lunch or a dinner, add this one to your home recipe box for a 30 minute go - to dish that is not only extremely simple but has an amazing amount of protein which is primarily plant based. I added some some super thin, well - seasoned chicken, but that is clearly optional to make it vegetarian. Leave off the feta and it's vegan. It's already gluten free. The base is sprouted quinoa and chickpeas. It has all the fresh flavor of a tabouli with tomatoes, cucumbers, red onion, parsley, lemon and good olive oil. I added hemp hearts for a little extra boost and tossed it all in a bright vinaigrette. It can totally be made a day ahead and stored in the refrigerator. It is best if left to sit for about an hour to let the flavors develop while you prepare the chicken or any other main course to pair it with.
INGREDIENTS
1|2 cup sprouted quinoa
1 cup cooked chickpeas, or 1 can drained + rinsed
1 cup vegetable stock
1 cucumber peeled + deseeded + chopped
1|2 pint cherry tomatoes, halved
1|4 - 1|2 red onion, shaved thin
2 T raw hemp hearts
3 - 4 chopped pepperoncini peppers, stemmed + seeded
1|4 c chopped parsley
1|4 c chopped mint
1 t dried oregano
salt + pepper + crushed red to personal taste
sprinkle of granulated or powdered garlic
2 T good quality olive oil
1 - 2 T red wine vinegar
juice of 1 medium lemon, seeds removed
drizzle of honey
feta cheese for garnish
*optional chicken breasts, butterflied + pounded thin
season chicken with salt + pepper + dried oregano on both sides
METHOD
Mix everything except the seasonings and acids together into a medium mixing bowl. Add half of the olive oil, lemon, vinegar, honey, oregano, salt + peppers. Set aside. Butterfly the chicken breast on your cutting board, cover with plastic wrap and pound very thin with a tenderizing mallet. Warm the rest of the olive oil in a large skillet and brown the chicken on both sides, about 4 minutes. Let it rest for 5 minutes, then slice thin and fan it over the top. Garnish with additional parsley and crumbled feta cheese.
ENJOY!!
Friday, August 26, 2016
Spicy Vegetable Spring Rolls
Even though it's not spring, these could easily be called summer rolls. I love the cold, crisp vegetables when it's super hot outside. Everything is raw. This recipe doesn't call for much direction other than the rolling method and the sauce, which I made. You can totally use your favorite dipping confection if you have one that you like. But of course, I encourage you to experiment and make your own! Nut sauces are super easy and only require a few ingredients, most of which I think you probably already have in your pantry. You can get the rice paper wrappers and rice noodles at any health food or asian grocery store. And, as always, there is so much room here for personal modifications. I have made a million versions of these. You can add good quality shrimp or salmon or tuna to make it more like traditional sushi and you can substitute any of these vegetables for others that you prefer. Be adventurous!
INGREDIENTS
1 package rice paper wraps
rice noodles
vegetables of your choice
cucumber
bell pepper
carrot
napa cabbage
red cabbage
jalapeno
avocado
cilantro
SAUCE
peanut, almond or cashew butter
tamari or soy sauce
rice wine vinegar
sesame oil
honey, maple syrup or coconut sugar
lime juice
cilantro
crushed red pepper
DIRECTIONS
It doesn't get any easier than this. No heat, totally raw. It does require a little knife work, however. Everything works best when julienned which is a matchstick cut. You can do this with a mandolin or manually with a chef's knife. Cut all of your vegetables into long, thin slices. Do the same with the fish if you're including that. Rice noodles are instant. You can do this first while you prep your filling. Cut the avocado into long pieces inside each half. The rice papers are hard in the package but get dipped in water for a few seconds to soften. Do them one at a time and assemble your rolls on a cutting board. It's like folding a burrito. Put everything in the lower third of the circle and then fold the ends over, then roll tight. That's it! The sauce assembly is just mixing everything together and adjusting the salty, sweetness. If you want it thicker, add more nut butter. Garnish with fresh cilantro or chives and devour!
ENJOY!
Labels:
Fare,
raw,
seasonal,
spicy,
spring rolls,
summer,
vegan,
vegetables,
vegetarian
Wednesday, June 29, 2016
Macrobiotic Black Bean Burger
Over the last month, I've literally made over 100 of these, and changed the recipe at least three times. I made 100 of them for the BIG OM YOGA RETREAT I cooked for earlier this month, and they were well-received! Check out their page for announcements on upcoming yoga retreats in Oklahoma!
The secret to the best vegetarian burger is the ratio of grains and vegetables to your sticky ingredients, such as flour, breadcrumbs and egg. I recently did a vegan version for a family I was cooking for and though they were delicate and softer than the ones made with egg, the taste was incredible. The trick is to let them cool for 5-10 minutes before assembling your burger or salad in order to allow them to set up. This recipe, as always, has room for many tasty embellishments and substitutions to fit your lifestyle preferences. I'll include those at the end of the recipe directions. Meanwhile, you can imagine the multitude of ways to have these deliciously healthy patties. Assembled traditional burger-style, on a salad or in a wrap, they make a protein-rich addition to any vegetarian ensemble just about.
INGREDIENTS
1 c cooked or canned black beans
3|4 c toasted, cooked quinoa ( be sure to rinse the quinoa before cooking )
1|2 c yellow onion, minced
2-3 carrots, grated
4 medium mushrooms, diced
2 cloves garlic, minced
1 T white miso
1|4 c oat flour
1|2 c breadcrumbs ( you can toast gluten free bread and put into the food processor if needed )
1 egg or substitute a flax egg if you're vegan ( 1 T flax meal hydrated in 1 T water for 5 minutes )
1-2 T nutritional yeast
pinch of cumin and smoked paprika
fresh chopped parsley or cilantro
sea salt + black pepper + cayenne to taste ( or fresh, diced jalapeƱo )
olive oil for sautƩing
Good vegetable modifications are grated zucchini, bell peppers and sweet potato!
METHOD
Warm the olive oil in a medium skillet. Add the onion and the carrot and sprinkle with salt to soften. Cook about 5-7 minutes and add the mushrooms and the garlic for another 5 minutes. Combine the quinoa and the black beans in a large bowl. Mash them together with a fork or potato masher until about half of the beans are broken down. Add the cooked vegetables and stir. Add the remaining ingredients and combine until the texture resembles a typical burger consistency, making sure that it is not too wet. You can add a little more breadcrumbs or flour until it becomes a little sticky and more on the dry side. Adjust your seasoning and put the bowl into the refrigerator for about 20 minutes before you cook them.
When it's ready, warm some more olive oil in the same skillet and form them into burger patties, making sure that they are mostly flat on both sides and have smooth edges. This can all be done with your hands. They will cook evenly this way but they are mostly cooked already, except for the egg. Cook for about 6 minutes on either side on medium to medium high. They can be prepared ahead and refrigerated or frozen between sheets of parchment paper for later and are easily reheated in the oven on a baking sheet or back in the skillet.
Serve them on whole grain buns with your favorite condiments and fixings or on a salad with fresh sliced tomatoes and avocado and a creamy dressing. Also great on pita or tortillas as a pocket or a wrap. The sauce in the photo is greek yogurt, whole grain mustard and sriracha! Topped with cilantro, this was my favorite way to eat them. Super light for breakfast and easily adapted as vegan and gluten free!
ENJOY!
Monday, May 9, 2016
Mediterranean-Style Stewed Chickpea Salad
I can't seem to get enough salad variations in spring + summer. This Mediterranean-inspired twist adds tons of extra flavor and nutrition to basic chickpeas, paired with a creamy avocado-yogurt-tahini dressing with lots of lemon, crunchy radishes and fresh cilantro. Getting hungry yet? This would make a great salad served family-style on a large platter with the dressing in a bowl on the side as a starter for falafel, lamb or even a chicken kabob. These flavors just holler summer and would make a nice dinner eaten outside on the patio. My family loves doing this. It adds a little special something and almost feels like we're eating out!
INGREDIENTS
1 - 2 cups cooked or canned chickpeas
2 ripe avocados
1|2 cup plain greek yogurt
1|4 cup raw sesame tahini
1 lemon, juiced and zested
5 - 6 radishes, thinly sliced
1 shallot, thinly sliced
2 cloves of fresh garlic, minced
cherry tomatoes cut in half
peeled, diced cucumber
red onion, thinly sliced or shaved (optional)
your favorite salad greens
cilantro, green onions, mint, parsley about 1 T each
cumin, turmeric, paprika about 1|8 tsp each
crushed red pepper or cayenne for heat, if desired
olive oil or ghee
sea salt + black pepper to taste
sprouted flatbread or pita
METHOD
Warm the olive oil and a teaspoon of ghee if you have it in a medium sautƩ pan on medium. Add the shallot and the garlic and cook for about 5 minutes, stirring constantly because they burn easily. Add the powdered spices and stir for another minute until they become fragrant and bloom. Stir in the chickpeas and a about 1|4 cup of water or stock to make a little pan sauce. Add the parsley, a bit of lemon zest and cover and turn off the heat. Make the dressing as this cools down a bit. Combine the avocado, yogurt, tahini and juice of 1 lemon, a pinch of salt and half of the mint and cilantro. Whisk it with a fork or blend it in a blender for a super creamy consistency. Assemble your salad by starting with a bed of greens, then tomato halves, cucumber and shaved red onion if desired. Spoon the chickpeas on next and wedge the radishes into that on their sides so that the red rim is showing. This makes a nice presentation. Top with your green dressing and garnish with the green onions and the remaining herbs. Toast your pita or flatbread and cut into wedges for scooping and dipping.
ENJOY!
Labels:
appetizer,
avocado,
chickpeas,
fresh herbs,
garden to table,
mediterranean,
quick dishes,
radishes,
salads,
seasonal,
spring,
stewed chickpea salad,
tahini,
vegan,
vegetarian,
yogurt
Tuesday, June 16, 2015
Quinoa Vegetable Soup
I know this soup looks a little heavy for summer, but it's actually much lighter than you think. Especially by adding a cool zig zag of yogurt and the addition of of this avocado salad on top. This vegan bowl has tons of delicious vegetables and is full of antioxidants, plant-based protein and amino acids from the combination of quinoa and red beans. There are lots of things you can add to vegan or vegetarian dishes to give them a bit of bulk or meatiness that will leave you full and focused. Additions like portabello mushrooms and smoked paprika can really transform a dish. I use both of them constantly. Of course, you can always modify this recipe with vegetables you prefer over ones that I have used in order to suit your preferences. If you're vegan, you can use a coconut yogurt and vegetable stock.
INGREDIENTS
1 yellow onion, diced
3 cloves garlic, minced
3 ribs of celery, chopped, with fronds
1 large carrot, diced
1 large portabello mushroom, thick sliced then cut in half
half of a large can of whole, stewed tomatoes and their juices
1 cup of cooked red beans, or 1 can of pre-cooked
1|2 cup quinoa, cooked
2 cups organic, low sodium chicken stock or vegetable stock at room temperature
smoked paprika
cumin
turmeric
crushed red chili flakes
salt + pepper
avocado
fresh chopped cilantro
plain greek yogurt
fresh jalapenos or salsa verde of your choice
olive oil
DIRECTIONS
Start with a medium large saucepan over medium heat. Warm about a tablespoon of olive oil. Add the onion, celery and carrot. Season with a sprinkle of salt. Saute until everything begins to caramelize and create some brown bits at the bottom of the pan. Add the mushrooms and cook for another five minutes. Add a big pinch of the paprika, cumin, turmeric and black pepper. Add some chili flakes if you like it spicy. De-glaze with the stock you're using. This will pull all of that tasty stuff up from the surface. This is called the fond. Add the tomatoes, breaking them into pieces with your hand as you do. Add the tomato juice from the can. Bring everything together and simmer for about 10 minutes. Add the cooked quinoa and the beans last. Stir another 5 minutes and turn the heat off. The quinoa and the beans will begin to absorb the liquid and the pot will thicken as it stands.
Serve your soup with a drizzle of yogurt or sour cream. Slice the avocados and lay them on top to one side. Garnish with a big handful of fresh cilantro or parsley if you prefer it. Top with fresh or pickled jalapenos and some salsa verde.
ENJOY!!
Monday, June 1, 2015
Roasted Cabbage and Crispy Potato Salad
Potato salad is one of those foods that really says summer. I always get the Fourth of July nomination to make my fairly famous recipe. For holiday flair, I like to use a mixture of red, white and blue potatoes. But my favorite potato is the traditional yukon gold. Rich and creamy, they make the best savory dishes. As you might imagine, my salad is far from the heavy versions you find in the grocery deli. I like to use three kinds of mustard, raw jalapenos and a blend of fresh herbs. Of course I like hard-boiled egg and bacon but I was on a mission to really trim the fat and come up with the healthiest version possible without sacrificing any of that flavor. This recipe incorporates the creamy element by using those gold potatoes, the smoky undertone from smoked paprika and also because it's baked instead of boiled. There's acidity from the mustards and lots of green herbs.
The cabbage was quartered, simply dressed and roasted on the same pan as the potatoes. It makes a delicious, tender center piece that you can use a knife to easily cut into. It's firm enough to stand alone and hold it's wedge shape. This dish could easily be an entree or a perfect summer lunch.
INGREDIENTS
3 - 4 medium yukon gold potatoes, cubed into 1 inch pieces
1 head green cabbage, cut into eight wedges
3 tablespoons mixed mustards, such as yellow, dijon and spicy brown
1|4 t smoked paprika
1|4 t powdered turmeric
1|4 t granulated garlic
raw jalapeno, minced or crushed red chile to taste
1 t each of minced parsley and thyme
olive oil
salt + pepper
parmesan cheese
DIRECTIONS
Preheat oven to 400 degrees. Line a sheet pan with foil or parchment to prevent sticking. Toss the potatoes in olive oil, paprika, turmeric, garlic, salt + pepper to taste. Add the mustard and the herbs. Stir everything to coat well. Drizzle olive oil over the cabbage wedges and season with salt + pepper and red chile flakes. Spread the potatoes onto the sheet pan and roast for about 20-25 minutes. Half way through, turn the potatoes and add the cabbage. The potatoes will be fragrant and tender when finished, and should slide easily off of the pan. Turn the cabbage over after 10 minutes. The wedges should be lightly browned on one side and soft on the other when finished. Serve garnished with parmesan and additional herbs if desired.
ENJOY!
Monday, August 25, 2014
ABC Butter
This is another super quick recipe in that same 'snack' chapter I mentioned in my last post that falls in line with our school year favorites. ABC stands for almond, brazil nut and cashew. Recently, there was a huge recall on almond butter and peanut butter sold from two popular natural distributors, Arrowhead Mills and MaraNatha Foods, due to a link between these products and salmonella contamination. These brands are household names for those who shop primarily at health food stores, and their products have been trusted for years. This case is a perfect example of an unlikely source for food poisoning. It further reiterates the increasing necessity for urban homesteading to take a step up in our kitchens.
While time allowances always soar to the top of the list of reasons that we justify not making more things ourselves, I think it's important to consider the potential risks with the alternative. Second, always comes the price comparison. Typically, it costs less or just about the same to gather the ingredients and do the labor yourself whether it's granola, almond milk, bread, salsa, hand soap, disinfectant etc. Even as a mother who works from home, I don't always have the time to devote to doing all of these things as often as I would like to, but I do always make a few hours throughout the week to at least make two or three of them. The backbone to successful urban homesteading is to balance the ratio of the products we consume with those that we make ourselves and those that we purchase. It also makes intelligent consumers out of us while it reduces packaging waste and environmental emissions, keeping more money in our pockets instead of shelling it out to big companies. You can vote further with your dollar by spending it locally, responsibly and in the community where you live.
Making your own nut butters takes about 10 minutes with a food processor. It's fresh and delicious! The risk of contaminating your own is pretty much a non-issue. Buy raw, organic nuts and experiment with combinations of them, like this one. I usuallly make plain almond butter with a pinch of sea salt and a drizzle of almond oil for the smooth consistency lovers in my house. But you can make traditional peanut butter or sunflower butter for someone with a nut allergy. Use a combination of hazelnuts and cacao powder and a little maple syrup for a far superior version of Nutella, which is actually just a glorified, sugary spread made with palm oil. When the first ingredient is sugar, it's an immediate red flag to steer clear. It will spike insulin levels, over stimulate the nervous system, depress immune response and acidify the body at an alarming rate, while soaring to the very top of the glycemic index.
There are healthy ways to replace products that we like with those are actually nutritious for our bodies and save money doing it. Try making a simple nut butter today and see what you think!
Here's a brief overview of the benefits of these RAW nuts:
- Almonds - demulcent, emollient, strengths bones, nerves and the reproductive system, antiviral
- Brazil Nuts - very high in protein and healthy oils, energy source, amino acids
- Cashews - good for teeth and gums, energy levels, and building healthy fats in the body
BASIC NUT BUTTER
Choose your nuts and make sure they are raw. You don't need to use a roasted, salted one because you can adjust the salt yourself and roasted nuts have been stripped of the essential oils that are the primary medicine you want from the consumption of nuts. Put about a cup into your food processor and process for about 5 minutes. It will be coarse and crumbly just before the oil is released and it turns into butter. Add a pinch of salt or honey or maple syrup if you like it sweetened and a drizzle of almond, grapeseed, sunflower or safflower oil will help it get to a smooth consistency. Process another few minutes until you achieve the texture you like. That's it! Store it in a glass jar in the refrigerator. Reuse one of your old nut butter jars and start experimenting with your recipes and desserts.
ENJOY!
Wednesday, July 30, 2014
Cauliflower Pizza Crust
I've been testing out gluten free pizza crusts for months and I've come across a variation of the popular cauliflower crust that I liked. I also had good success with a quinoa crust that I will post later on. Keep in mind when making this, it won't turn out hard and crispy like a thin crust because cauliflower doesn't behave like flour. The addition of parmesan into the 'dough' gives it some good texture but this is a softer shell that sets up better if you transfer it immediately to a cooling rack when it comes out of the oven. Instead of using a traditional marinara, I made a roasted red pepper cashew sauce that is very similar but higher in nutrition and lower in acid. You could use that same sauce on a regular pizza shell of course, and on pasta, lasagna and as a sandwich spread or salad dressing.
Squeezing the water out and allowing the cauliflower pulp to drain gives you the best results for a dry crust. If you skip this step, it turns out wet and soggy and falls apart.
You will get about a half cup of water from one head of cauliflower, which is excellent if you aren't making it this way. That water is rich in nutrients and minerals and shows you how much water you get from your vegetables. You could save it an add it to the red pepper cashew sauce or freeze it and add it to a soup or dressing later on.
The 'dough' is pretty soft in the beginning and takes a little shaping. You could form it into a square or a round or an oval at this point. It isn't going to rise or spread like flour, so it will retain whatever shape you make before you bake it.
It looks nice and golden brown and crisp around the edges when it's done. Pre-baking the crust makes it firmer and releases the flavors of the herbs and seasoning in the 'dough'.
Topped with your favorite ingredients and baked just like pizza, it's crispy and brown on the edges and smells heavenly like roasted vegetables! Transfer it to a cooling rack a few minutes after it comes out in order to let the crust set up underneath. Gently slide it off of the parchment onto your rack.
CAULIFLOWER PIZZA CRUST
1 head of organic cauliflower
1|4 teaspoon sea salt
1 T nutritional yeast
1 T olive oil
1|2 garlic powder
a big pinch of dried basil and oregano
1|4 cup grated parmesan or romano cheese
DIRECTIONS
Preheat your oven to 450 degrees. Blanch the florets in hot water for about a minute, then drain and cool. Pulse them in a food processor until it resembles rice or coarse meal. Transfer to a thin dish towel or cloth napkin. Squeeze out the excess water into a measuring cup if you are going to save and use it, or over the sink if you aren't. Turn out the cauliflower into a medium mixing bowl. Stir in the rest of the ingredients. Spread out a piece of parchment paper inside of a sheet pan and spray it down with cooking oil. Form your 'dough' into the shape of your pizza, about 1|4 inch thick all the way around. Bake it for 10-15 minutes or until you see the top and edges start to brown. Remove it from the oven and set it aside. Gather your sauce and your toppings.
ROASTED RED PEPPER CASHEW MARINARA
1|2 cup raw cashews
1 red bell pepper, roasted over an open flame and seeded
or 1|4 cup roasted red pepper strips from a jar
dash of salt + garlic powder
1 T nutritional yeast
juice from 1|2 lemon
a little water or the reserved cauliflower liquid
DIRECTIONS
Put the cashews and a little liquid into the food processor to get it started into a coarse paste. Add the remaining ingredients and the rest of the liquid until it becomes smooth and sauce like in consistency.
You're ready to build your pizza. Top the cooled crust with your sauce and your toppings. Sprinkle with cheese and return it to the oven for another 10 minutes or so. Watch it closely and when everything is beginning to brown and becomes fragrant, you're done!
ENJOY!
Tuesday, June 25, 2013
Sweet Potato Tapas
In the summer, I am always drawn to south of the border flavors. I crave lime, cilantro and fresh salsa constantly it seems. Although I just showed you a black bean recipe in the previous post, I had some beans and quinoa left over so I reinvented them into a tasty mash for these roasted sweet potato rounds. This is a gluten-free confection that can be served like an appetizer or as a meal, depending on how many you eat. It was hard to eat just four, I promise. And of course, if you omit the shrimp, it's vegan.
The word tapas is of Spanish origin, meaning something you can find any time of the day. Typically paired with a cocktail, it can be anything from a skewer, to miniature tacos to a piece of tuna with some tasty garnish. Small portions. Basically, appetizers. These would be divine with a Mexican beer and lots of fresh lime.
INGREDIENTS
1 sweet potato, sliced into rounds about 1|4 inch thick
black beans or pinto beans
cooked quinoa or rice
avocado
tomato
fresh shrimp (optional of course)
cilantro
salsa
lime
olive oil
salt + pepper
chili powder
nutritional yeast
DIRECTIONS
Preheat your oven to 400. Lay your potato slices on a sheet pan, single layer. Drizzle with olive oil, salt + pepper and chili powder. Bake about 15 minutes. Remove from the oven. Mash together your beans and your quinoa or rice. Season with salt + pepper, garlic powder and nutritional yeast. Add a splash of water and warm it in a small pan. Slice tomatoes and chop your avocado into chunks. If you are using the shrimp, remove the tail and saute in a little butter and season. Build your tapas by spreading the beans on first, then the tomato, avocado and shrimp. Top with fresh salsa, cilantro and a squeeze of lime juice.
ENJOY!
Labels:
Fare,
gluten free,
summer,
tapas,
vegan,
vegetarian
Sunday, June 23, 2013
Black Bean Quinoa Burger
These vegetarian burgers are so versatile, healthy and delicious you might find yourself daydreaming about the endless combinations of flavors you can recreate them with. I have played with the recipe for years and finally found the right balance of protein, fiber and grain to get a really good texture. You can rotate all of these items to fit your food mood, whether it's Mexican, Mediterranean, Indian or Italian!
I made this tasty burger at the UNPLUG + RECHARGE Retreat that I worked at this weekend. I did a presentation on how to put everything together with lots of good tips on properly accessorizing your food and substitution ideas for making it just right for YOU. We had a discussion on incorporating plant-based protein into our diets while reducing saturated fat and empty calories. Then we dined!
A well-rounded diet consists of the right balance between protein, fiber, grains and vegetables. It improves digestion and absorption of minerals to eat a healthy fat and something raw with every meal. The ratio is a little different for everyone. Experiment with foods until you find what makes you feel good! Don't be afraid to fail. The learning curve is dotted with trial and error. Own it. Your diet is not something you go on and off of, like a program. It's what you eat. Structure your life in a way that keeps you in the driver's seat. Our diets are a lifestyle choice, not a trend. I encourage you to try something new today and step outside of your comfort zone!
INGREDIENTS
1 cup of cooked black beans (or pinto, garbanzo, kidney, lentil)
1|2 cup cooked quinoa (or millet, brown rice, bulgur wheat)
1|2 cup cooked yukon gold potato (or sweet potato, russet, red)
1 egg (optional - you can leave it out if you want to make these vegan but your burger will be less firm)
red onion
carrot
bell pepper
mushrooms
garlic
jalapeno (if you want it spicy)
1|4 cup almond meal (or breadcrumbs)
nutritional yeast
fresh parsley
parmesan cheese
salt + pepper
olive oil
DIRECTIONS
Dice all of the vegetables and sautee them in olive oil until tender. Cook the quinoa and the potatoes in the same pot while you do this. When everything is finished, put the beans and potatoes in a large bowl and use a potato masher or a fork to mash it together. Stir in the quinoa. Add the vegetables, egg, parsley and almond meal. Season your mixture with the nutritional yeast, parmesan and salt + pepper.
Form into patties and chill in the refrigerator for half an hour if you have the time. If not you can cook them right away in the skillet in olive oil. You can also bake these at 375 degrees for about 20 minutes. If you do, you will need to spray the top and bottom of the patty with cooking spray or brush them with oil. You will get a crispier crust if you make them in the skillet though. You can easily make these vegan and gluten free. They are just as tasty, but the consistency changes. Serve these on a whole wheat bun with thick slices of tomato and avocado and spring mix or on top of a salad with your favorite dressing.
You can also freeze them between pieces of parchment paper and seal in freezer-safe bags for later. Allow them to defrost for about 15 minutes before you cook them.
ENJOY!
Tuesday, June 18, 2013
Summer Pasta, Two Ways
During the summer, when I want to spend more time out doors and less in the kitchen with the burners on, especially at dinner, I like making a one pot dish that pleases both the parents and the kids, who can be very picky eaters as I'm sure you know. Though we are constantly exploring different vegetables together around here, they each have their own favorites and sometimes that clashes when we are trying to simplify our evening routine without making a dinner movie that leaves a sink full of dishes. I really love hearty pastas that are made from whole grain. They pack a ton of fiber and plant-based protein into one serving. Here, I used a new favorite made by Eden Organics that is a kamut-quinoa spiral. It has 5 grams of fiber and 8 grams of protein in a single serving. Whole grain pastas are more filling so you tend to eat a smaller portion. Mixed with vegetables, it becomes a complete meal. I like to eat mine cold with raw vegetables tossed in a homemade vinaigrette over fresh spring mix. The kids really love macaroni and cheese, so I came up with this cauliflower alfredo variation to the traditionally high calorie, saturated fat dish.
INGREDIENTS
CONFETTI VEGETABLE
1 box of whole grain pasta, such as Eden kamut-quinoa spirals
red, green or yellow bell pepper, seeded and diced
red onion, diced
shredded carrots
black olives, halved
cherry tomatoes, halved or quartered
fresh herbs: parsley, basil, thyme, oregano
spring mix
vinaigrette of your choice or a homemade favorite
CAULIFLOWER ALFREDO
2 tablespoons of cauliflower puree (steamed cauliflower pureed in a blender or food processor with a little water until smooth)
1 teaspoon nutritional yeast
1 small pat of butter
splash of lowfat milk
a few grates of parmesan cheese
pinch of salt
SIMPLE HOMEMADE VINAIGRETTE
red wine vinegar
olive oil
(this is 2 to 1 ratio)
a tablespoon or so of dijon mustard
fresh chopped thyme and oregano
grated clove of garlic
a small squeeze of honey
lemon juice to taste
pinch of salt and pepper
add everything to a jar with a lid and shake or add the olive oil last and whisk it in
DIRECTIONS
Salt some boiling water and cook the pasta according to the box. You'll want it to cool to nearly room temperature before you add it to the vegetables so do this ahead of time so that it can cool as you prepare everything else. Prep all of your vegetables for the confetti pasta and add to a mixing bowl. You can make many tasty substitutions here such as grated zucchini or squash, sliced mushrooms, radishes, broccoli etc. Add as much or little as you like - you cannot really get these amounts wrong. Add the parsley and the basil. Make your dressing. Add the cooled pasta to the bowl and mix in the vinaigrette. Serve over spring mix and garnish with parmesan cheese. Serve with whole grain toast.
Make the cauliflower alfredo by adding the ingredients to the saucepan the pasta was cooked in, turned on low. Bring it all together with a whisk until warm. Adjust the ingredients to suit your taste and consistency preferences. Add the remainder of the pasta to the pan and mix. This sauce is a really healthy diversion from the usual mac and cheese or alfredo because the bulk of it is the cauliflower puree. The rest of the ingredients are used in small amounts to give it a creamy texture. Nutritional yeast is an awesome supplement to savory dishes because it is incredibly high in all of the necessary B vitamins.
This dish requires one pot and only takes about an hour from start to finish.
ENJOY!
Subscribe to:
Posts (Atom)